Monthly reflections – October 2014

Decided to write some monthly reflections, help me track my progress as a photographer and keep followers posted…

Excited about my photo exhibit coming up, looks like mid-November to mid-December. I have picked up the framed photos from Michael’s and they look really good, if I say so myself. Had to decide on pricing, and went with $150 per framed photo (12″x 18″ photo, 18″ x 24″ framed), based on cost of printing and framing, their 30% cut, and wanting to make a little profit on them… They accepted my Artist Statement (tee hee…) Finalizing details on exhibit dates and reception then I’ll start inviting everyone…

Tried out for the Ann Arbor Art Center All Media Exhibit with two photos:

path through lush scenery

Lake Titicaca watch tower watchers

Timing was such that if I waited until I was selected I wouldn’t have time to get them framed by their deadline, so I went ahead and got them framed and then learned I didn’t get in… Can’t feel bad, there were over 140 applications! Oh well, they’re ready to go for a future exhibit and so far I have spent less in framing than I have made in stock photography this year, so eating into profits but not going into debt…

I am in the process of applying for another exhibit at the local botanical garden, have printed the photos but I think I can wait until I learn if I’m in before I have to invest in framing them…

The logo photos project is an unqualified success! Significant sales, have taken many other photos that I have yet to processed, been too busy with other things to take more, but itching to get back out there, gotta make time around day job and personal time… That should keep me busy during the winter months…

I’m considering getting a new lens,  maybe a 35 mm or a 50 mm, I really can’t make up my mind… Likely ’cause I’m not totally sure whether to prioritize portraits or street photography, know I’d like to take indoor shots that let in more light… This article has some ideas. Any suggestions?

That’s it for October. Need to make more time for photography, trying to prioritize so many things, life is so short…

Milestone – My first solo photo exhibit – car details! Advice?

I’m so excited, I’m going to have my first solo photo exhibit!  In addition to stock photography I love to take photos of car details, and the University of Michigan has accepted a set of 12 photos for an exhibit “It’s all in the details: Car design,” to take place on North Campus in November.

I got the photos printed through online service AdoramaPix, and framing through Michael’s framing here in town.  The framing manager there, Ryan, has been tremendously supportive of my photo endeavors, so I’m happy to do business with them. I looked up local places but it just didn’t work out.

The exhibit folks offered to have a reception. At first I was thinking I wouldn’t have a reception, as I really don’t like to have attention called to myself, but my artist friend Shonda Bottke insisted I had to have one, so I agreed.

What advice do you have for me as I prepare for this first exhibit and the reception?  I’d love to hear from you, thanks!

01_Montgomery_light_blue_hood 02_Montgomery_1937_Chevy_side 03_Montgomery_1960_Corvette_side 04_Montgomery_1962_Blue_Imperial_tail_light 05_Montgomery_1949_Ford_Club_Coupe_grille 06_Montgomery_1957_Chevy_flames_hood 07_Montgomery_1957_Chevy_red_tail_ornament 09_Montgomery_Packard_Executive_ tail_light DETROIT - JANUARY 27 : FILL IN HERE at The North American International Auto Show January 27, 2013 in Detroit, Michigan.

08_Montgomery_1957_Chevy_ tail_light 10_Montgomery_Buick_Eight_front_grille 11_Montgomery_Buick_Eight_spare_tire

October 19th addendum – Some details figured out. Exhibit will take place November 16 – December 13, Pierpont Commons piano room, 2101 Bonisteel Blvd, here in Ann Arbor. I can’t wait… :)

Shooting stock photos – Traveling Vietnam Memorial exhibit

My sister and I recently had the good fortune to attend The Moving Wall exhibit when it visited Hamburg, MI. It’s a traveling half-size replica of the Washington, D.C. Vietnam Veterans Memorial. We were very touched by how caring everyone was, how solemn and strangely peaceful it was, and how very well organized the event was. I took a number of photographs and selected the best, which I sent to the organizer via email from my stock photo email address, offering them for her to use, free of charge, of course.

Vietnam wall guy

Vietnam wall flowers

I requested official permission to take photos so I could submit them to stock photo sites, explaining how they work, and gave her the template text, following Shutterstock’s permissions format:

To whom it may concern,

I grant Susan Montgomery credentials to photograph (name of event) in (location) on (date)

Name of authorized person, Title
Organization

They were pleased the photos and promptly granted me permission, and I got a number of them approved!

On reflection, what I did right:

– Took my time and waited for the right occasions to get just the right shots. We walked back and forth three times looking for the right occasions.

– Tried many angles and positions.  I started off with a flower shot in another location, kept working the angles, trying different views. Overall I probably took about 15 before getting to this one. It’s a wonderful feeling when you feel you got the shot that expresses what you were trying to say…

– Kept my distance, to respect those who were honoring loved ones. There were many shots I didn’t take because they would have been intrusive.

What I would do differently next time:

– If schedule allowed it that week-end, gone on a sunnier day, for a better background sky.

– Worn a duller color, I had to be mindful of not having the reflection of my bright t-shirt on the black wall.  Now I see why photographers often wear dark.

Overall we were very glad to get a chance to see this touching and thought provoking exhibit. I have been to the permanent one in DC, but it had been many years, and this traveling one is quite special. You can see the photos that Shutterstock accepted here.


Shooting stock photos – Store logos

I had noticed that many articles on websites and newspapers about companies include shots of company logos, so I decided to hunt up some company logos for stock photo shots. I went early on a Sunday morning with no bright sun to one of our streets with lots of stores and went up and down the different strip malls and took shots of close-ups of logos:

ATT

and store fronts:

BBB

I then cropped and aligned them, and composed an editorial caption by looking up some news about them, and following Shutterstock’s captioning instructions , so for example:

ANN ARBOR, MI – AUGUST 24: Chili’s, whose east Ann Arbor store logo is shown on August 24, 2014, has announced it will create a line of frozen foods.

I also have to remember that when I submit them to iStockphoto I have to change the capital letters at the start to lower case to match their caption style…

What I did right:

– Went on a Sunday so parking lots were empty and I could move around easily and not so many folks thinking me creepy for taking photos. Some of the shots were taken from the van.
– Made sure my van was not showing in the reflection of the glass..
– No bright sunshine, so no harsh shadows
– Looked up news about each company, or if I couldn’t find any news looked up their website and wrote up how many stores they have in the US or some such.

What I would do differently:

– In some cases I got just the logo and not the store, later realized I should get one of each, so going back to reshoot some of them.
– Weather was a bit too cloudy at times, so some shots were not as good as I’d like, have to back for some of those too.

Some might think of this as too much like work, but I am a collector at heart, so this is more like a scavenger hunt for me, really enjoy it for some weird reason… To see all such photos in my Shutterstock collection click here.

Dec 6 addendum – You can see by looking at my complete Shutterstock collection by popularity just what a huge hit the logos have been – sharp increase in my Shutterstock income!

Milestone – One thousand hits!

So today SusanMontgomeryPhotos.com reached 1,000 hits. I’m thrilled ! I know many of the blogs I follow have over 1,000 followers, and tens of thousands of hits, and I’m in awe of them and inspired by them, but in my little corner of the world here, 1,000 hits is humbling…  I have thought for a few years about starting this website to help others with their stock photography adventures, and this summer I decided to go for it, and it looks like some people are indeed interested in learning from my experiences, how flattering… It has helped me to write it too, as I reflect on each of my big shoots to see what I did right and what I could do better next time.

Thank you very much for reading, and if you have any questions I have not addressed let me know, I will do my best to help you, paying forward all those who helped me get this far…

Best wishes in your photography adventures,

Susan

Shooting stock photos – Michigan Football Youth Day!

Had lots of fun last week-end shooting photos of UM football players at the University’s Football Youth Day open house! How I prepared:

– I checked into permission to take photos, since it took place inside the stadium. I sent an email to their media relations person, asking for permission using the text Shutterstock likes to see:

To whom it may concern,

I grant (photographer name) credentials to photograph (name of event) at

(location) on (date)

(Name, role)

(Organization)

(of course I had filled in as much as I could…) He replied with “The Youth Day is open to the public so we won’t have a credential for media.” I saved my email request and his reply with full organizational info as a PDF file and a JPG file to submit to stock websites so they’d know Michigan folks were OK with me taking photos.

– I looked over the UM football website to see that they had a roster of players with photos, so as long as I could see their jersey number I would be able to match up players to names, so I didn’t have to worry about that.

OK, off I went, went there early and they let us into the stadium, then got a cool behind-the-scenes photo of the team getting their team photo taken before the start of the event:

Football team photo

Then they let us in, and remembering that Shutterstock won’t accept editorial photos with identifiable children unless the child’s name is included and not wanting to deal with asking for kids’ names, I decided to focus on photos of the players only (see what I would differently below…).

The players were quite obliging, particularly if I caught them at a break between autograph seekers and asked them by their name and with a smile on my face, and wished them a good season afterwards, got lots of great close-ups of many players, including Sione Houma and Jake Ryan:

UM football Houma

UM football Jake Ryan

Since I started out on the field I stayed there and got shots of the freshman players, followed by a photo of coach Hoke, though not too thrilled with that one but there was a really long line so I didn’t dare ask him to pose for a photo, had to shoot between autographs…  I then started with the players closest to him going around the stadium, taking the time to get an overall shot:

UM football day long

I worked my way around the stadium, taking photos of each player in their position, but unfortunately didn’t make it all the way around before time was up, the hour and a half just flew by!   To review…

What I did right:

– Good prepwork, so I knew I had permission and that I didn’t have to waste time writing down everyone’s name.

– Asked the security folks for suggestions of strategies to take photos, they were most obliging with ideas, and treated all security folks with utmost politeness.

– Wore my cheerful “Michigan Happiness” t-shirt again, that seems to put people in a good mood.

– Kept checking photos and adjusting ISOs as needed as I went to different levels of shade, with a goal to keeping that 1/400 or 1/500 shutter speed to help ensure focus.

– Was mindful of backgrounds as much as possible. Just a few inches to one side or the other was enough to avoid having too many pop dispensers in the backgrounds.

– Focused and composed as the players were signing autographs so I knew I had the settings all good by the time I asked for their photo. I didn’t want to waste any of their time, and got most shots the first try.

– Took the time to get that shot looking down the stadium, I love the composition on that one.

What I would do differently:

– Worn more comfortable shoes, what was I thinking wearing flip flops?

– Skipped the field to start, gone with coach Hoke first then starting with the more popular players and working my way the opposite direction that I took. But then who knows, one of the freshmen I got photos of might just hit the big time and I’ll have his photo from back in the day and seem brilliant…

– Taken more photos of players “in action” signing autographs for grown-ups, thus avoiding my “no kids” rule and yet getting more action shots…

– Reminded myself of the numbers and names of the most popular players, to have a “must get” list…

You can see all the photos from University of Michigan Football Youth Day at my Shutterstock website. If you have any other suggestions for such events I invite you to share it as a comment, thanks!

Shooting stock photos – Outside major soccer game

Apologies for the delay in posting, I decided to change my process to post after I’ve heard from Shutterstock so that I can let you know in the same post how successful I was, then I had a bit of a carpal tunnel issue with my right hand, so I took it easy processing photos for a bit… But I’m back at the updates:

August 2 Manchester United played Real Madrid at the University of Michigan’s football stadium – Largest crowd to ever watch a soccer game!  I was not interested in watching the game itself, but figured I’d hang out before the game and see what stock photos I could get.

I headed down by the stadium and walked around, took some photos of people who were already posing, making sure I got some of the location-specific clues, like the stadium fence:

Man United fans


Then I realized that Fox Soccer had a booth outside the stadium, so I went over and got this photo of sports analysts Warren Barton and Eric Wynalda:

fox guys

Eric was amazingly generous with fans, taking photos with many of them, as Warren was somewhat.  I hung out and took more photos of them, aiming for head shots, and even got one of Rob Stone, though he was more private so I had to wait a while to catch him… I think Eric was starting to think I was a bit creepy after a while…

Then I went to where rivers of fans were walking toward the stadium and took some photos of interesting folks as they walked by:

ManUnited white red

Also feeling more comfortable just nicely asking people if I can take this picture, like this other fan, who was happy to oblige:

ManUnited black red

This is where it’s nice to have my business cards, so if people ask what’s going to happen to the photos I can give them a card and they can look in Shutterstock to see if it got in, or email me for their photos. This time no one asked, so I just kept shooting…

Then there are the people who notice you are taking photos and just pose for you, like these guys:

ManUnited lads

My sons think that being a middle aged mom helps here because no one feels threatened by me. I can see that…

What I did right:

– Wore my “Michigan Happiness” shirt, to look even less threatening.

– Wore comfortable shoes, I was walking around a lot…

– Smiled at everyone, asked nicely, gave people thumbs up after I got their picture.

– As always, went with the 1/400 shutter speed to be sure to be in focus, played with ISOs (mostly 200) as the weather changed.

– Used my 18-105 lens on my 16 MP camera. It worked great for the walking around shots, most at around 50 mm and for the Fox guys I could use 100 mm and crop it and still get above the 4 MP required for many stock agencies. I’m glad I left the zoom lens home, didn’t really need it and it would have just been a hassle changing lenses.

What I would do differently:

– When I got the shot of one of the team buses I should have run over to where I knew the players would be dropped off to get shots of the players going into the stadium. I figured it would take too long for me to get there, but later as I was walking around they were just finishing dropping them off.  Probably should have gone over there first and talked to the security people and try to find out their expected arrival time.

To see all the shots that Shutterstock accepted check here.

What tips do you have for shooting crowds at events?

From Digital Camera World – 24 of their most popular photography cheat sheets

Get quick access to lots of useful tips to improve your photos, from the cheat sheets of Digital Camera World, with credit to my sister for passing me the link. They include:

1. 54 portrait ideas: Free downloadable posting guide
2. 6 simple lighting set-ups for shooting portraits at home
3. Free f-stop chart: Master your aperture
4. Free family portrait photography cheat sheet
5. How to use a histogram – photography cheat sheet for achieving perfect exposure
6. Portrait photography cropping guide
7. Free wedding photography cheat sheet
8. Understanding the color temperature scale: Free photography cheat sheet
9. Free portrait lighting cheat sheet
10 Metering mode cheat sheet: how they work and when to use them
11. How to pose for photos: Find the most flattering angles for you and your subjects
12. What is exposure compensation: Free cheat sheet for photographers
13. Full-frame sensor size explained: How to exploit its advantages for pro-quality pictures.
14. How to calculate hyperfocal distance: Free photography cheat sheet
15. What is ISO: Camera sensitivity setting (and the best ways to use them)
16. Free night photography exposure guide: Best camera settings for popular subjects
17. Home studio setup: 6 things every photographer needs
18. Best shutter speeds for every situation
19. Using apertures: When to go small and when to go wide
20. What is flash sync? Your flash modes and when to use them
21. Autofocus point options: What subjects should each be used with
22. What your camera captures at every focal length
23. 3 ways you can affect depth of field: Photography cheat sheet
24. The landscape’s greatest challenges: Free photography cheat sheet

Check them out here , and share your own tips in the comments section below.

From DPS – Ten go to editing tips for using photoshop

From the folks at Digital Photography School, some quick photoshop tools that might save you lots of time. They discuss:

1. Duplicating layer masks for other adjustment layers

2. Adding a curve adjustment layer with a difference

3. Dodge and burn

4. Layer comps

5. Stamp visible

6. The “place” command

7. Patch tool

8. CMD+T or Transform

9. CMD+T+Warp tool

10. Opening second window for the same document

Learn more about how they use these time saving tools here and share your favorite photoshop tips in the comments section below.

Shooting stock photos – around Ann Arbor

This week I had some time to take a few stock photos around Ann Arbor. I have a long list of possible photos I think would be good to take, so when I have some time I can check my list and see what I feel like taking. This week I focused on some companies headquartered in Ann Arbor, the Ford Presidential Library, and people getting off the bus at a commuter lot nearby.

What I did right:

– Had the list of potential photos in the first place, so I could quickly get a set to focus on. Ford library has been on my list for over a year, I knew I wanted the sun on the front of the library, but not too bright or the contrast would be too much. That afternoon was pretty good for that.

Ford Library
– Looked for other opportunities as they came up keeping national issues in mind, such as the traffic jam that I could see as I waited at the commuter lot.

Highway traffic
I again started with making sure my ISO was at 100, since I was outside on a nice day, set the white balance to sunny (with change to cloudy as needed), and used shutter speed priority with 1/250 or higher. As I took the shots I checked whether I had to make adjustments to the exposure to span the full histogram and not cut out darks or bright whites.

What I should have done differently:

– Looked up the bus schedules, so I didn’t waste time waiting for buses that didn’t arrive… Didn’t even think to go inside the bus shelter, where the schedule was displayed. I found that out the second afternoon I went, having just missed the busiest bus the first afternoon…

In cleaning up the photos there is not much to do since I had good settings to start with, so mostly focused on a good caption and good keywords. I have submitted them, we’ll see how they do…

PS Update – Shutterstock took some of them, not all, but I liked them enough to submit to others, you can see Dreamstime took the highway one.

From DPS – How to Master Your DLSR in One Afternoon

Digital Photography School has another great article for beginners, this one gives an introduction to

ISO
Aperture
Shutter Speed

These are the three components that determine how much light gets into your camera, and discusses each component’s effect on other factors such as focus area, noise, and focus, with good examples.

Read it here

Shooting stock photos – Roller Derby game!

Last Friday I attended an event I’ve wanted to attend for a long time, Roller Derby! The Ann Arbor Derby Dimes are a terrific organization that fields three roller derby teams. Last Friday they had a meet with two matches.

Here’s what I did to prepare for the event:

– Read the organization website to learn more about them
– Read the rules of roller derby so I’d have a better sense of how the game works. You can get a quick sense of it in this YouTube video .
– Contacted the team to ask for permission to take photos. I didn’t hear back from them and as it is I had a conflict that first night I planned to attend, so I ended up just showing up at their next event, last Friday.
– Did a search on photographing roller derby events to get some tips. The ones that stood out included:
– Use very high ISO for the terrible light conditions
– Use very quick shutter speeds to freeze motion
– Try focusing on a place on the ground and shoot when
the pack gets to that spot so you don’t lose time focusing.
– Don’t take photos of anyone who get seriously hurt
– Take photos of everyone, rather than focus on just the jammer.

OK, then I was ready to go. I went to the site, paid for my ticket, and explained that I was a stock photographer and was interested in taking photos, and shared my policy: I send them the photos first, and only submit them to stock agencies if I get their permission in writing after they see the photos. I also assured them that I would not use any photos that would be disrespectful.

The team members couldn’t have been more welcoming! They seemed very pleased at the attention. They even said I could eat from the volunteer refreshments table if I wanted to, though I didn’t take them up on that offer, I didn’t want to make the players uncomfortable during their breaks, and I wasn’t sure if the photos would turn out OK…

Then the game started, and what a great display of athleticism and sportsmanship! Here’s what I did right:

– Brought my business cards, which gave me greater credibility as a professional.
– Checked my photos frequently and adjusted ISO, shutter speed, and exposure as needed. This is called “chimping” by the way…
– Wasn’t afraid to go to high ISOs
– Took photos of more than just the players, to include many of the volunteers
– Agreed to take photos of the entertainment, Devil Elvis when the lead singer asked for photos for their website.
– Used the “continuous slow” setting to get many photos of the action, but not so many that my card fills up too quickly.
– Respected all rules and stayed out of the way of everyone.
– During pauses in the action I erased photos that I could tell were terrible. Even with that I ended up with over 800 photos…
– Let the photos sit for a couple days because when I first looked at them all I could see were the mistakes. Going back after a few days more objectively I could see that there were some good shots in there…
– Edited down photos like a mad woman to get to the money shots.
– Use the noise filter in Photoshop to remove some of the noise that invariably was there with such high ISOs…

What I would do differently next time:

– Clear out my photo cards before the event. I had photos still in there from another event, should have cleared them to my laptop and erased them so I didn’t have to worry about limits on memory…
– Move to the other side of the track for the second game. The first game I aimed at the wall at one end because all three other sides were open and light was very bright, which would lead to blowouts. However, after the sun set the area near that wall was very dark, which made for some very dark backgrounds for those photos… Have to be more mindful of changing photo conditions throughout the event.
– Asked some of the other photographers what settings they were using. I was too shy to do it, and likely would have learned a lot by taking to them, lost opportunity…

Here are some of the first photos I have processed:

Ann Arbor Roller Derby, defensive preparation - Shutter speed priority, ISO 3200, 1/500 sec
Ann Arbor Roller Derby, defensive preparation – Shutter speed priority, ISO 3200, 1/500 sec
Ann Arbor Roller Derby -  Jammer super move - Shutter speed priority, ISO 3200, 1/500 sec
Ann Arbor Roller Derby – Jammer super move – Shutter speed priority, ISO 3200, 1/500 sec


Devil Elvis, half-time entertainment


I was so very impressed by these athletes, what a terrific evening! I’ve sent them some sample game photos, I’ll post an update after I hear from them and (I hope) get to post some on stock photo websites.

July 16 update – Heard back from the team, they loved the photos, are going to use them in their advertisements, and they have invited me back as a guest to their next match, I’m thrilled! Still waiting on official permission to take the shots, so not submitting anything to the stock agencies yet.

August 28 update – Permissions all ironed out and approved by Shutterstock, photos submitted and approved so far are here .

Shooting stock photos – Detroit solo photo day

Had a great day in Detroit Sunday, spent much of the afternoon taking photos. Here’s what I did:

To prepare I saw what photos already existed, looked through Things To Do in Detroit, and through FourSquare found this great list of Historic Areas of Detroit. I also looked up companies with headquarters in Detroit and noted their addresses.

Then, with a general sense of what I wanted to get, I set off, stopped at the Uniroyal tower on the highway and took some shots of the abandoned Detroit Central Depot, walking around trying different angles, etc. until I got one that worked:

Central Depot Shutterstock

It was great to be flying solo today so I could take as much time as I wanted and try different angles.

Drove toward downtown, spotted some casinos, and headquarters of DTE Energy:

DTE Energy Shutterstock

I then spotted Cass Tech high school and stopped there, where I met Burt, a homeless man who accepted my offer to take some photos of him in exchange for $5. We had a nice chat, I emailed him his photos – he mentioned he had not checked email in over a year…

Detroit Burt

Kept heading downtown and parked near Campus Martius park, found my bearings and decided on a walking path that would take me to Hart Plaza, the River Walk, Greektown, and back to Campus Martius. Lots of nice photos, though I wish there had been more people around to make it livelier…

I drove on to the Fox theater / Comerica park area, got some photos there. By then it was after 4 pm, but the game wasn’t until 8 pm, so not that many people around, had to wait a bit to get some folks in this photo:

Comerica Shutterstock

Then over to Ford Field, and while I was there a fellow asked me to take his photo – I obliged, he gave me his email address and I sent him the photos, why not?

Ford Field fellow 1

I was going past the Detroit Opera House when it was letting out a matinee performance, so got some shots there, then called it a day, I was tired from all the walking!

I took 216 shots altogether, resulting in 41 photos submitted to Shutterstock, and 39 acceptances! To see all the photos, visit  my Shutterstock site

What I did right:

– Good planning so I had some sense of what I wanted to catch, but left myself open to serendipity. A general check-list but no strict to-do list, since I live nearby and can drive in another day to catch remaining ones.

– Generally good camera settings. Again went with ISO 100 and shutter priority with 1/500 shutter speed, adapting as needed. I increased ISO in shady areas, changed exposure to make sure my histogram was squarely within the range and I wasn’t cutting off blacks or blowing out whites.

– Comfortable walking shoes, I was exhausted from all the walking…

– Was friendly and cordial, took photos of those who asked, chatted with people who asked questions, and if folks wanted me to send them photos I did. Some just asked to have their photos taken and then just walked on happy…

– Went early on a Sunday, so free parking was plentiful.

What I’ll do differently next time:

– For a different set of photos I’ll go at a busier time or to an event in Hart plaza, to catch it at a livelier time.

– Bring my water bottle with me. I filled it up and left it in the car…

Overall a wonderful day, just me and the camera and all the time in the world…

Susan

From PictureCorrect – Eight Worst Habit of Beginning Photographers

Another great list, this one from PictureCorrect, of what not to do:

BAD HABIT #1: SHOOTING IN BRIGHT DAYLIGHT (need to avoid harsh shadows)
BAD HABIT #2: SHOOTING JPEG (though I do it…)
BAD HABIT #3: CENTERING THE SUBJECT (reminder of rule of thirds)
BAD HABIT #4: SHOOTING FROM EYE HEIGHT (so many angles you miss out this way)
BAD HABIT #5: IGNORING THE BACKGROUND (you saw this in my 4th of July entry)
BAD HABIT #6: TAKING COMMONPLACE SHOTS (that’s been fun, getting creative)
BAD HABIT #7: HAND-HOLDING EVERY SHOT (though I’m learning to get away with it)
BAD HABIT #8: TAKING ONE SHOT (definitely, don’t take the shot, make the shot)

Check out the details at PictureCorrect.

From DPS – 5 Photoshop Tools to Take Your Images From Good to Great

From the folks at Digital Photography School, 5 very quick and easy to understand tools that will get your photographs that “pop”. They discuss the following tools:

– Shadow and Highlights
– Levels
– Color balance
– Hue and saturation
– Vibrance

which are pretty much the tools I use most of the time. Check them out here

Shooting stock photos – 4th of July parade

Shot stock photos at Ypsilanti’s 4th of July parade, I just love 4th of July parades, I get all sorts of emotional and patriotic…  Here’s what I did right and what I’ll do differently next time:

– I researched the parade route, figured out a good place to park, got there early, played with camera settings. Went with ISO 100 since it was a nice sunny day, shutter priority with my shutter speed at 1/500 to ensure good focus.

– I used my 70-300 mm zoom camera to get close-ups but when I look at my photos few went beyond 100 mm, and you’ll see I missed some good shots because I couldn’t zoom out enough.  Next time I’ll stick with my 18-105 mm lens.

– I wanted to get some shots with the iconic Ypsilanti water tower, so I placed myself on the right side of the road and I did get some nice shots with the tower:

Fire department truck at Ypsilanti 4th of July parade 2014

but being on that side of the street also meant that I ended up with more commercial logos in the background than I wanted on the close-ups:

Save the bomber plant supporters at the Ypsilanti 4th of July  parade, 2014.
Save the bomber plant supporters at the Ypsilanti 4th of July parade, 2014.

Luckily I was able to catch them after the parade and got a nice photo with the water tower in the background:

Save the Bomber Plant supporters at the Ypsilanti 4th of July parade, 2014

I was very nice and smiled and waved to everyone, and they waved back and would pause to get their photo taken:

Omega Psi Phi group at Ypsilanti 4th of July parade, 2014.

Here’s where my zoom lens was a mistake, next time like I said, 18-105 mm…

Got some good shots of the Ypsi cheer team:

Ypsilanti High School cheer team at the Ypsilanti 4th of July parade 2014

and of veterans:

Vietnam veteran at Ypsilanti 4th of July parade, 2014

Even this quite close-up one was only 70 mm, so I clearly didn’t need the zoom, should have switched back earlier…  Live and learn…

People will give you every chance to give you a nice photo. This was my 4th try at this guy, other participants kept getting in the way:

Parade participant at Ypsilanti 4th of July parade, 2014

again, though, note the crowded background – next time, other side…

Having gained confidence from people wanting to have their photo taken, when I was not happy with my shots of Debbie Dingell, who is running for her husband’s position in the US Congress, I ran ahead and tried again and asked “Mrs. Dingell, can I have a photograph?” and she paused for me:

Debbie Dingell at the Ypsilanti 4th of July parade

Note I was on the other side of the street with trees in the background… I’ll go with this angle next year…

So to recap:

– What I did right:  Good research, good camera settings (ISO 100, shutter priority at 1/500), good shots with iconic water tower, friendly attitude, nice close-ups.

– What I’ll do differently next year:  Alternate to other side of street for cleaner background, go with 18-105 mm lens.

That’s the thing with photography, always learning… I’ll process the photos tonight and will report back on Shutterstock results…

Susan
PS All the ones I submitted got accepted! You can find the collection here.

Shooting stock photos – family vacations

Recently I wrote up a post about on shooting stock photos while on a business trip. For a family vacation the preparation might be the same, but execution is quite different for me. I recently had a week-end “Up North” in the northeast part of Michigan, including a day at Mackinac Island, with my boyfriend. My approach is different for personal vacations with families:

I don’t worry about getting the perfect shot – Sure, it’d be great from a photography perspective to stay at that location 20 more minutes waiting for just the right shot, but I just can’t see making my loved ones have to wait… I got a pretty decent shot of the main street in Mackinac Island, and that’ll have to be good enough. As supportive as he is to be willing to wait, I wanted the week-end to be about us.

I don’t stress out if I miss some key locations – I let serendipity drive my vacations sometimes and who knows, there might be some new photo opportunities there…

I might have to skip the solo photo excursion – Sometimes I’ll have the option because of what others want to do to have a few hours to go off on my own and get those shots but with a small group and short amount of time I go with the flow and capture what you can along the way.

I focus on making memories – Sure, it’s tempting to invest in a water-proof case and take shots of family during an upcoming white water rafting trip, but I know if I do that I’ll focus more on getting the right shot and not on enjoying the experience to the maximum with my sons. I’ll just buy the photo the outfitters will provide, which will likely captures the experience better than I will ever be able to.

Overall, I try to remember that I am on vacation to get closer to my family and make memories, they did not sign up to tag along on my photo safari. I figure I get a lot more support from my family for my photo career if it doesn’t intrude on our family time.

I’ll be processing these photos soon – I’ll update this post when they are published.

I can imagine others would disagree with my philosophy, would love to hear your thoughts in the comments.

Shooting stock photos – business trip to Indianapolis

I traveled to Indianapolis on a business trip and took advantage to take some stock photos. Steps I took to prepare:

Made sure my equipment was ready – Camera lens clean, battery and back up batteries charged, lots of space in the memory cards

Searched for stock photos of Indianapolis – It was clear folks had done a great job of skyline photos, so no need to do those, got some ideas for others.

Searched online for popular Indianapolis sites – Got some nice ideas, a river walk, monument circle… Added them to my reminder app on my iPhone.

Searched things to do and events – Googled for events calendars to see if there were any interesting events that might yield some good photos, good to know beforehand.

Got familiar with the area – Looked through a map of the area near the convention center, where the meeting was, so I could see which locations were nearby and I could catch during lunch breaks, etc., and which would be more of a drive.

I took some notes on some things I think I did right, so todo’s:

Take photos even in bad weather – Weather wasn’t great the first evening I got there and there were some bad shadows, but I had the time so I scouted some locations, got some just in case photos.  When I had the chance to go back I knew exactly what I was going for.

– Get the basics right first – First thing I did was check my ISO (100 if outside and sunny, down to 400 on really cloudy day, much higher if inside), then my shutter speed (1/250 to help ensure decent focus, else if inside I’d taken my monopod I’d have gone with a slower shutter speed). Took some test shots and checked my histogram to make sure I wasn’t missing some very dark areas or blowing out light areas, and adjusted the exposure as needed.  Exposure of +x moves the histogram to the right, of -x moves it to the left.   (My Nikon D7000’s presets are such that you have to rotate the exposure wheel to the right to decrease it and the left to increase it, which seems counterintuitive to me – I forget how I did it but you can change the preset so rolling right increases exposure and rolling left decreases exposure, so my finger motion matches what I want the histogram to do. Unfortunately I can’t remember how I did that and can’t find it – If you know it, please include in the comment section, thanks!)
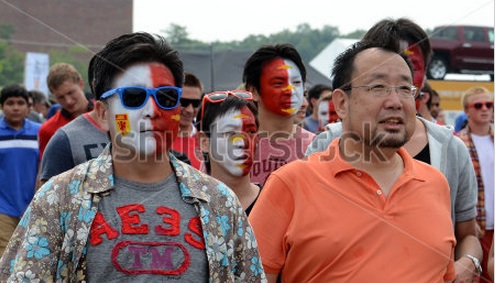
Wait for the right shot – I took many outdoor shots of locations, and I would take a few shots then wait around to see if the scene got better, aiming for more folks in the shots, maybe a bicyclist riding past for additional interest and depth, think more “layers.”

DSC_3133 copy

Not something I would do on a family trip, but being by myself I could afford to do so. 

– Check the edges of the photo  – Sometimes I’d think I have a great shot but there was something in the edges of the photos that would have ruined it. Just moving a bit to one side or the other, or kneeling, would remove it.

Get farther  – When I shot the “perfect” shot I would shoot one more with a little less magnification, for a bit more flexibility when editing/cropping.

Get closer – I tried to avoid taking the standard tourist shot, still working on that one.

– Think of what photos you haven’t taken – Sometimes I’d think I was done then realize there were other looks, other angles, vertical vs. horizontal, tried to push myself to come up with better views.

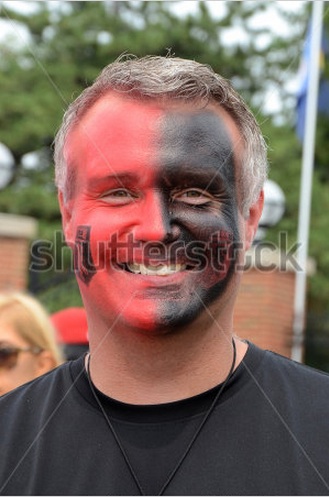
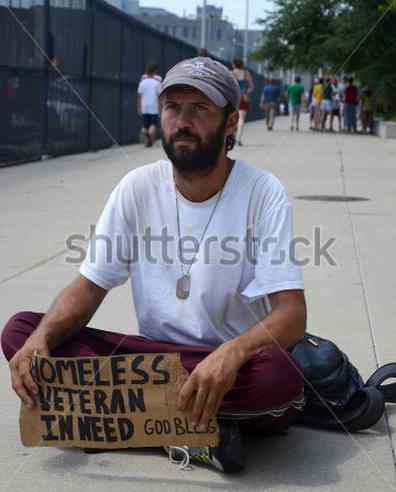
– Be open to serendipity – I noticed some donation boxes to feed the homeless, so I shot some photos of it and people walking past it. Also realized that there are rental bikes available in Indianapolis, and my photos of those in Chicago are fairly popular, so I shot some of those too.  Walk around with an open mind.

DSC_3150

– Go for the iconic shot – I tried to think of an iconic image, not only the natural tourist shot. Still working on those.

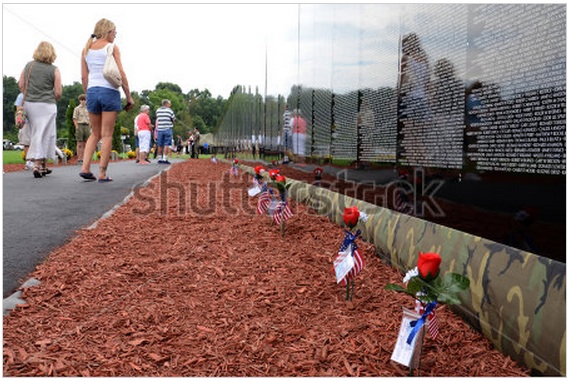
– Take pictures of any descriptive plaques – Often public locations have a plaque describing it. I always grab a quick photo of it, for interesting information I’ll use for the photo description.

What other suggestions would you have for someone taking some stock location photos with limited time? I invite you to share your tips in the comments.

I’m going to edit, crop, and generally clean up the final photos and submit them, wish me luck. Search my Shutterstock site for Indianapolis soon to see how I did…

From DPS – Learning about ISO, shutter speed, aperture, aka the Exposure Triangle

I mentioned Digital Photography School as an excellent resource for tutorials. They recently celebrated their 8th anniversary and posted their 15 most popular tutorials.

Three of these are some great tutorials about ISO, shutter speed, and aperture, which are the three settings that determine how sensitive the camera is to light (ISO), how long your shutter is open to allow light in (shutter speed), and how big an opening you have for that light to come in through (aperture, which affects how much of your photo is in focus). I encourage you to check them out:

ISO settings in digital photography

Introduction to Shutter Speed in Digital Photography

Introduction to Aperture in Digital Photography

Then let me know what you think in the comments!

Susan

Need Help with your Macro or Business? Get Mike Moats’ e-books

For those who can’t attend Mike Moats’ wonderful workshop, here are some e-books you might want to get.

Mike Moats's avatarMike Moats

Daily Macro View

____________________________________________________________________

Need help improving your macro skills, or looking to make a little money with your photography, check out my e-books.

Creating Art With Macro – $14.95 click here

70 Tips for Making Money as a Nature Photographer – $4.99 click here

___________________________________________________________________

View original post