

I am happy to announce that I have created a SmugMug gallery! I did a lot of research and a SmugMug gallery together with this blog seemed like the best solution for me. In this entry I am sharing what I did to help others who might be considering starting one.
I intend to use my SmugMug gallery to:
- Showcase my photos to friends and photo editors that I might contact in the future so they can see samples.
- Make event photos available for download for groups. These will mostly be photos of events that I am making available for free to the event organizers.
- Maybe even sell a photo or two…
Selecting a Format
I looked for a “clean” format, chose one named Dina, and adapted it just a bit to have a “White Duotone” background to have a slightly different color in the menu portion on the left. It was very easy to add sections to the menu:
Uploading photos
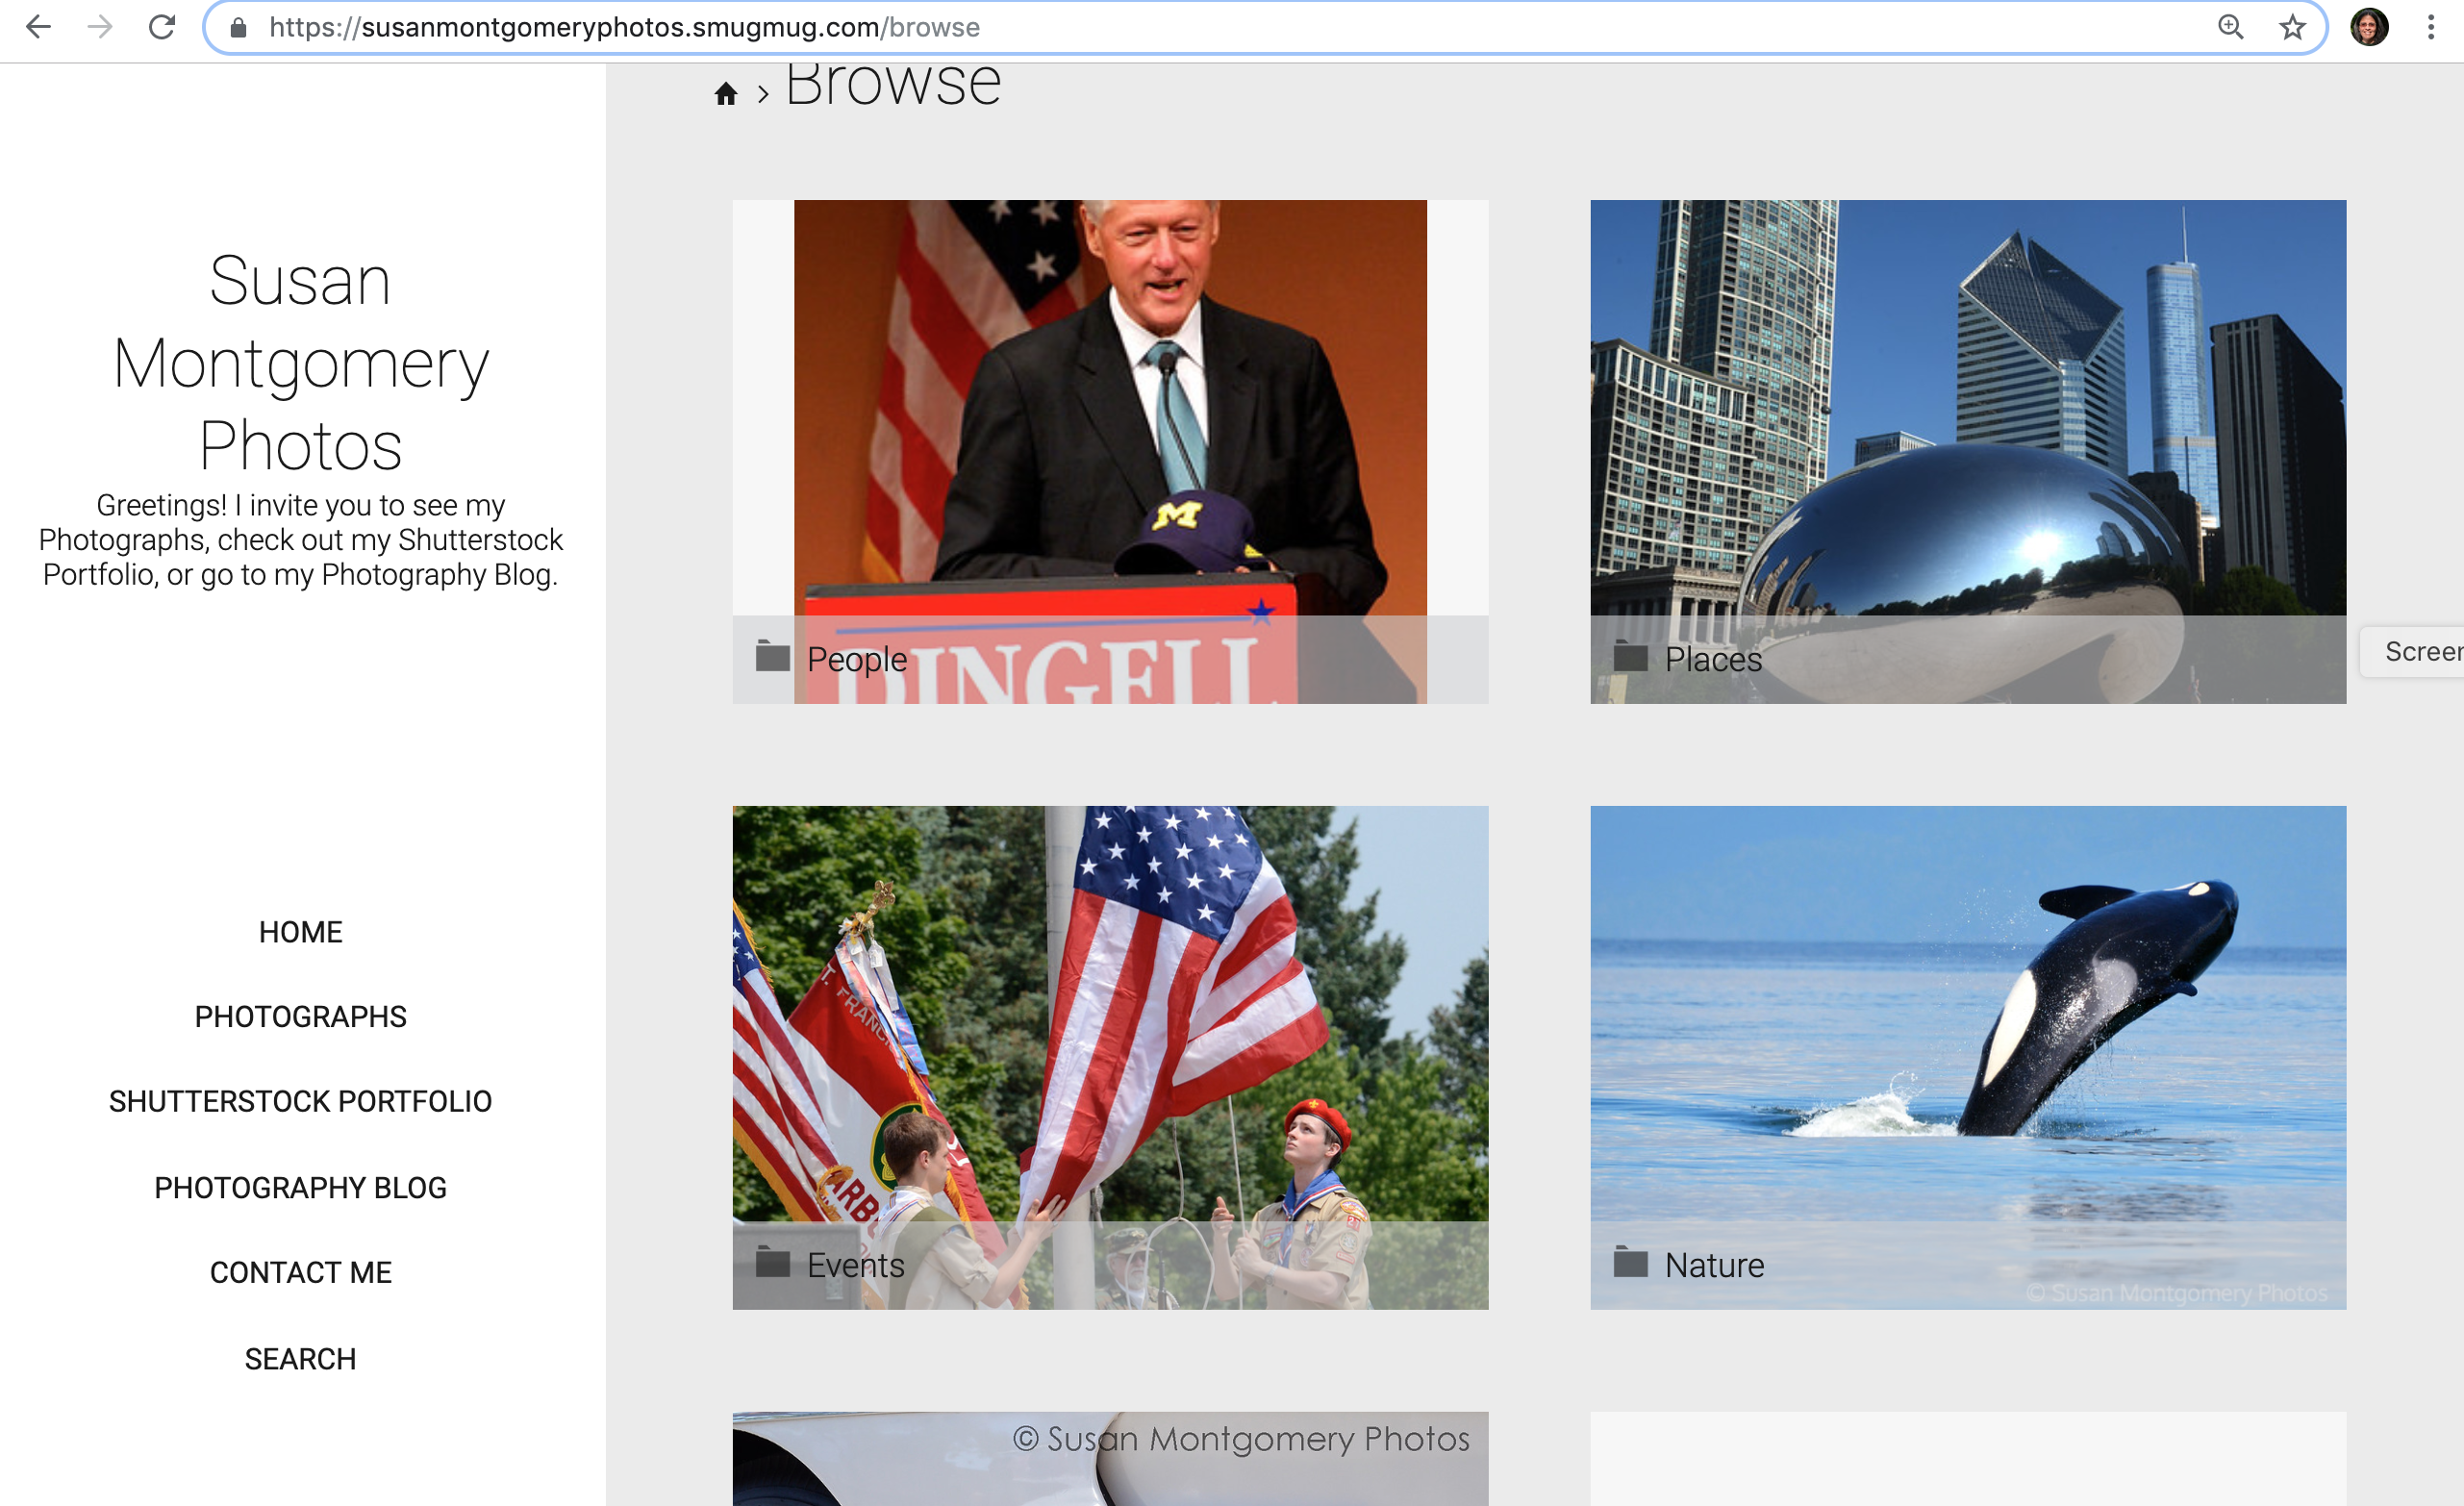
Uploading photos was very easy, and I could place them in “galleries” that can be organized into “folders:”

I just uploaded them from my laptop, but you also have the option to upload from other sources, e.g. Lightroom. Arranging folders and galleries was very intuitive. I have reorganized the galleries and folders easily, e.g. I had a “photojournalism” folder for “events,” then decided to move “events” to the top layer, nothing to it, just scoot galleries around like you would folders on your computer.
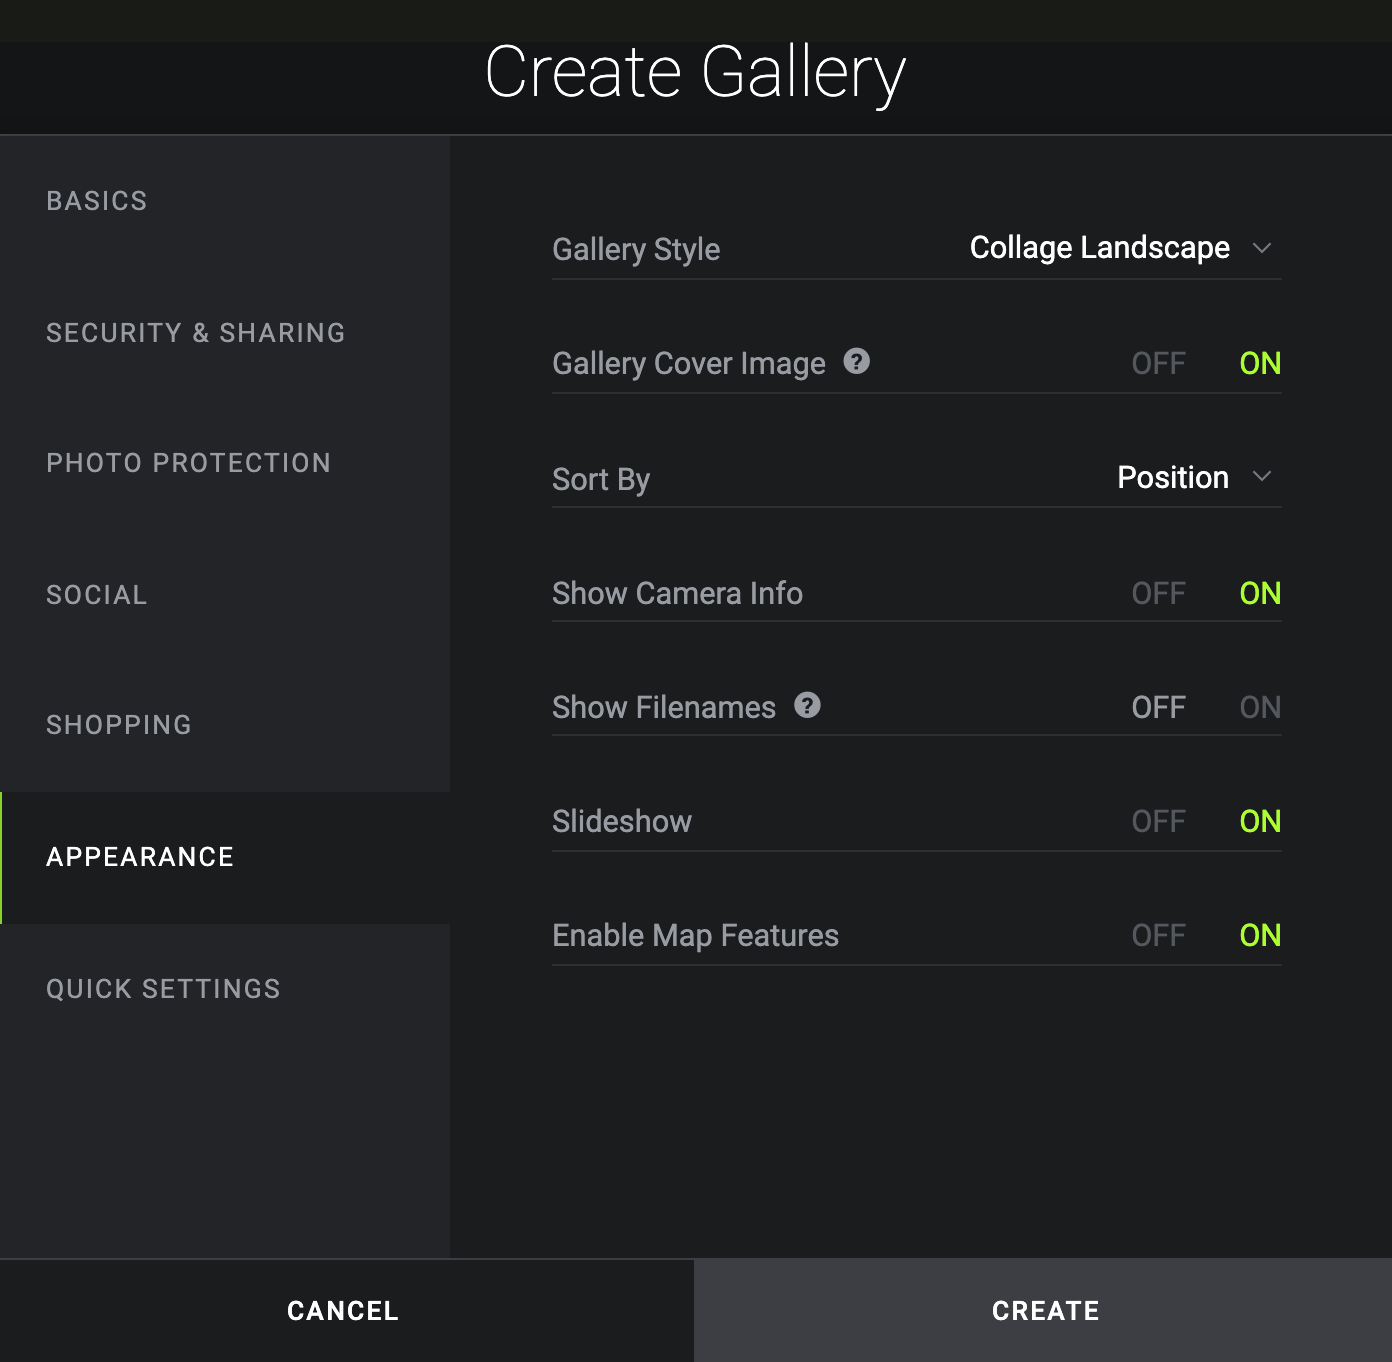
Displaying the photos within a gallery
There are many ways to display the photos. I went with Collage Landscape, but there are many other ways, and it would be trivial to change that if I were to change my mind, either for individual galleries or globally. You can also determine whether to include a slideshow, and many other features:
Help features very useful
SmugMug has a very helpful support center that walks you through the whole process, a search for help lands you on very relevant and useful articles:

Photo security options
SmugMug gives you many options to secure your photos. After much research I decided to take three steps:
- Set a small image size for the displayed image, so if someone downloads an image it’s not of great quality, not suitable for framing, etc. I might decide to go even smaller in the future, we’ll see
- Add a “right-click message,” also in the “Photo Protection” section when you create the gallery. The idea is when someone right-clicks to download your photo they instead get a message that you can personalize. Mine reads: “All photos are © Susan Montgomery. Look for the buy button to buy a print for yourself. Thanks!”
- Add a watermark to the photos – SmugMug makes this trivially easy, you can save a watermark image, or create on within SmugMug, which I did, then when you create a gallery you can tell it to add a watermark to all photos in the “Photo Protection” section. So the watermark shows up on the screen and downloaded photos, but not in ordered ones.
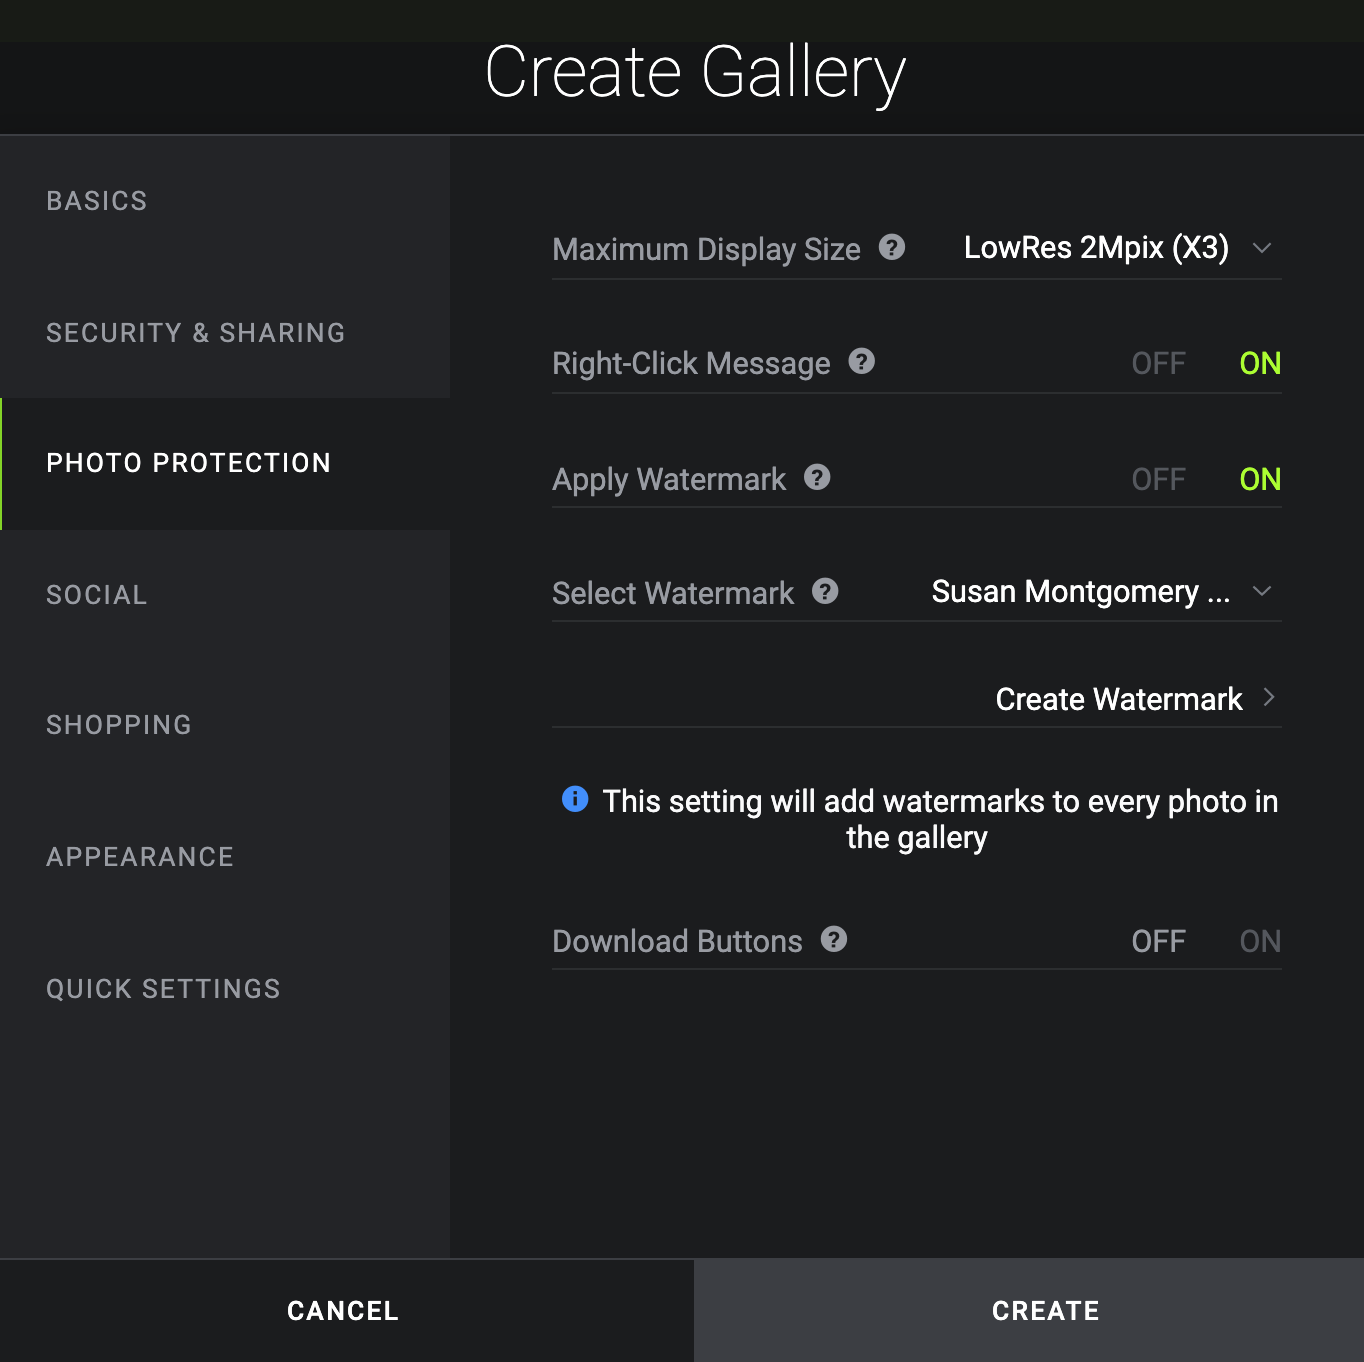
I realize none of these are totally foolproof, they can take a screenshot, etc. but I’ve done what I can, I’ll leave it at that.
Selecting a subscription
I also had to decide which subscription to get. The current options are:
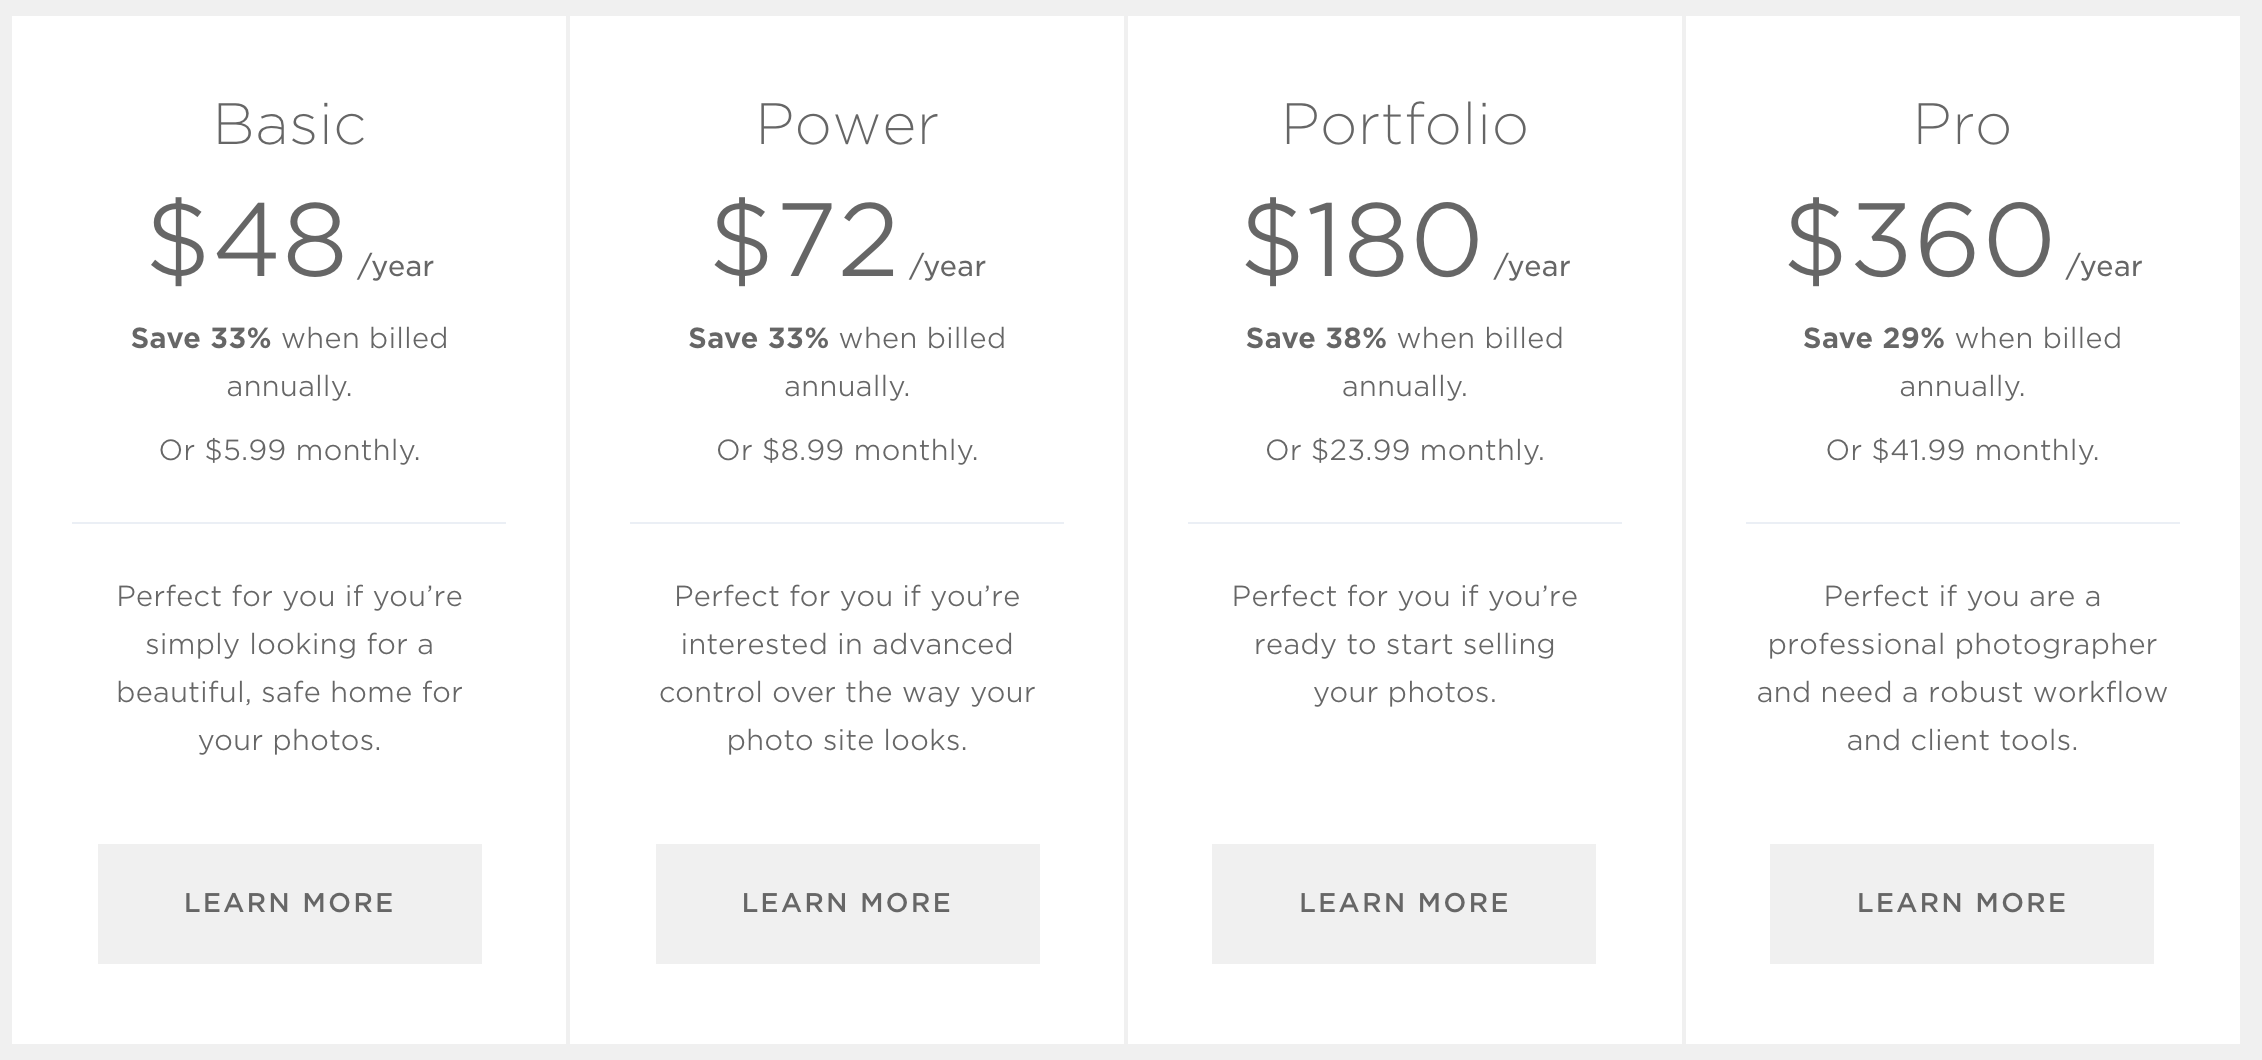
As a professional photographer the plan is to have some sales, so I went with the Portfolio option. I originally selected the Pro option, then I realized that was overdoing it for my purposes so I changed it to Portfolio and they updated it right away and gave me a credit, didn’t have to wait until renewal time, which I very much appreciated.
As for prices for sales, I decided to just go with the SmugMug presets, we’ll see how it goes.
Next steps
If you have any other questions about setting up a SmugMug website let me know in the comments below and I’ll do my best to answer them. In the meantime, if you decide to proceed yourself, you can get 20% off your first year subscription if you use this link , or the one at the top of the page, to get started. Full disclosure, I also get 20% off your subscription price toward my next update, thanks!
Best wishes on YOUR photography (and SmugMug!) adventures!
Susan
